ESP8266 IR Blaster
I’m getting sick of fixing my TV remotes. Universal remotes are all over priced monsters. So instead I thought I’d wack together an IR blaster from the spare parts draw.

The goal here
I thought it would be easy, infrared remotes use decades old technology. I wanted to use an ESP8266 I had laying around for its WiFi. Surely its a popular project with millions of guides and examples to work off?
Not really, or at least the guides I found were… lacking. So, let’s see what you’ll need to pull this off
Getting IR Codes#
I thought the internet would have every IR code known to man by now. There is a big collection, irdb.tk, but it is shockingly poorly organised, poorly labelled, and only shows codes in a lowest common denominator format. Plus at time of writing it’s no longer online.
Save yourself the hours I wasted searching and capture the IR codes from your own devices with an IR receiver.
Sending IR Codes#
IRremoteESP8266 is the library you want. It’s really great, just maybe lacking some documentation. Different code formats have different methods with different required arguments. So I guess it’s up to you to guess? One of my codes was recognised as NEC_LIKE. There’s no NEC_LIKE method, can I still use sendNEC()? Who knows.
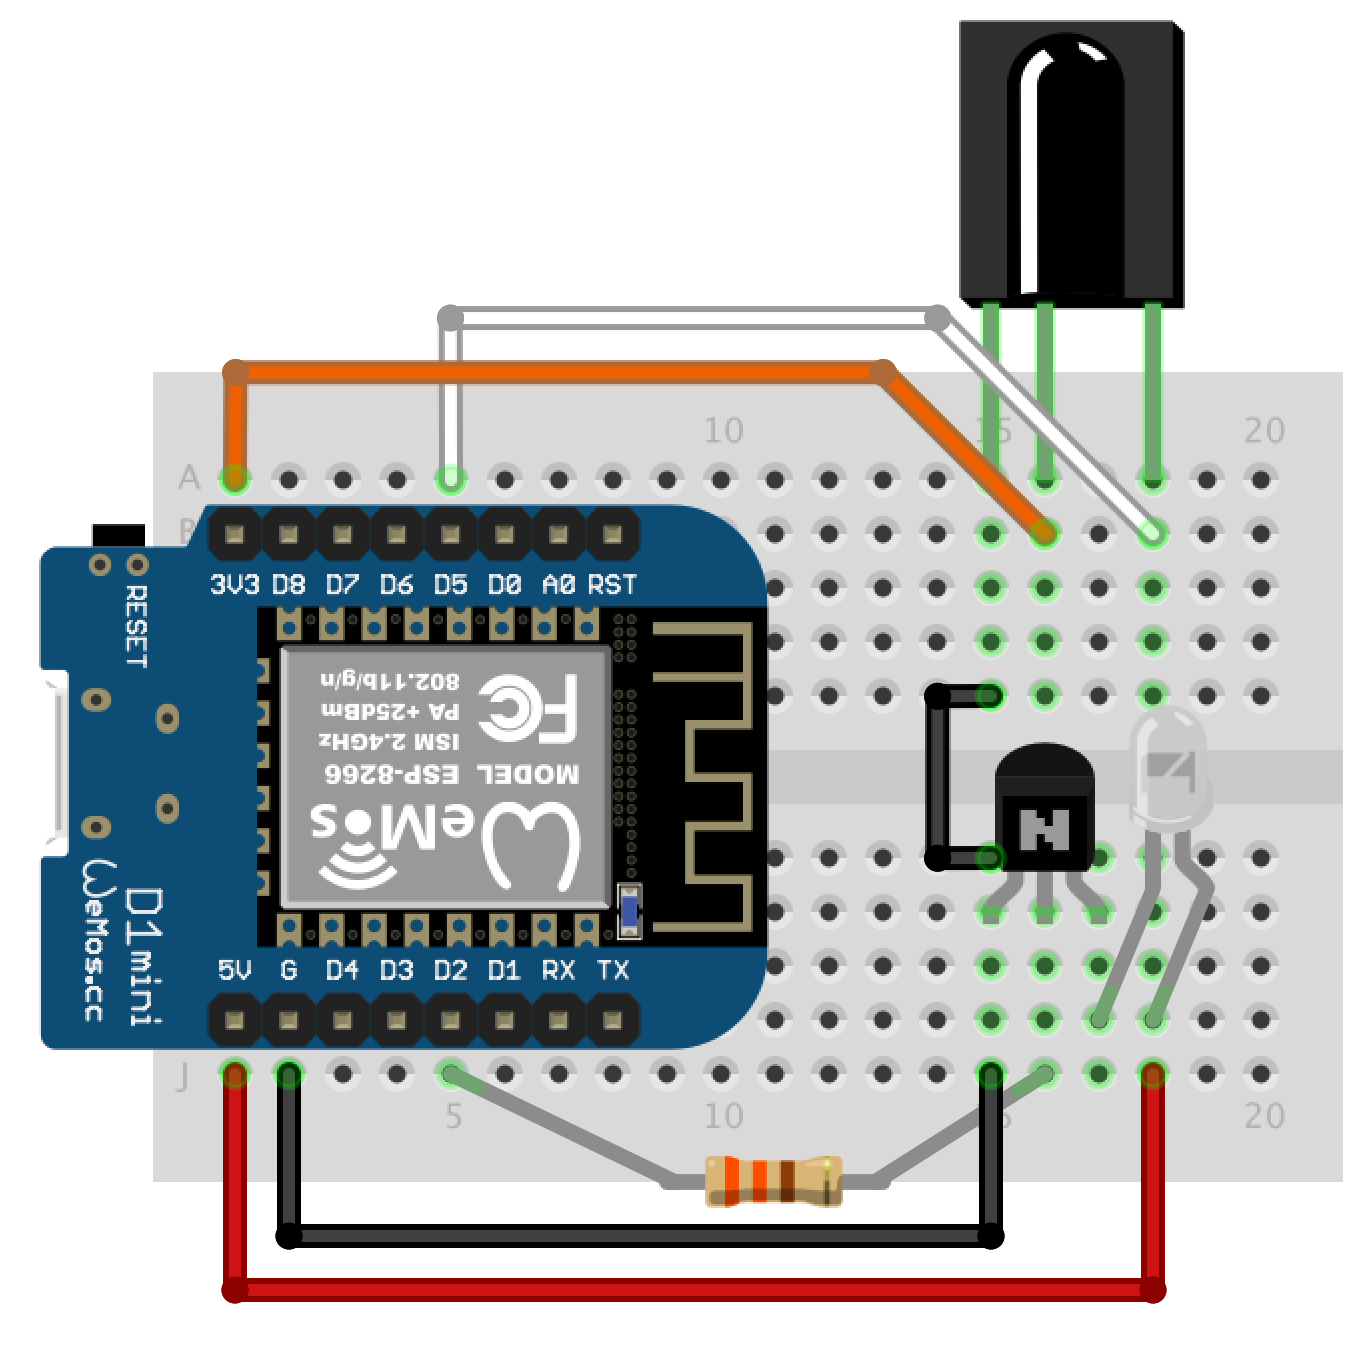
I wouldn’t wire the IR LED to the GPIO pin directly. A typical IR LED will want 50mA to 100mA, while the ESP8266 GPIO pins can only handle 12mA of current, the poor little guy. Use a transistor like so:

Credit to witnessmenow
Your LED might be better off at 3.3V or even need a resistor to drop the voltage further, I leave it in your capable hands to figure out.
Connecting to your WiFi#
There are more complicated ways to do this I have opted to avoid, instead just using ESP8266WiFi.h:
#include <ESP8266WiFi.h>

//Specify a static IP and network in a non-obvious format.
IPAddress local_IP(192, 168, 1, 30);
IPAddress gateway(192, 168, 1, 1);
IPAddress subnet(255, 255, 255, 0);

//The rest should be in setup()
WiFi.mode(WIFI_STA);
WiFi.config(local_IP, gateway, subnet);
WiFi.begin(SSID_STRING,PASSWORD_STRING);
//It'll take a few seconds to connect.
//Let's wait in a slowed down loop, we're not in any rush.
while (WiFi.status() != WL_CONNECTED) {
  delay(500);
  Serial.print(".");
}
Serial.println(); //newline
Serial.print("Connected, IP address: ");
Serial.println(WiFi.localIP());
Most strange is the WiFi.mode(WIFI_STA); line. I didn’t include this for the first couple of weeks, everything working fine. Then I noticed a “ESP-487766” SSID in my home. Somehow, this little microcontroller was connecting to my home WiFi while simultaneously acting as it’s own AP, with no password! The cheeky devil!
Web UI#
Now there’s a lot of potential ways to send the commands over the WiFi. I’ve personally gotten sick of the Siris and Alexas and cloud connect apps. Just give me a single webpage I can link on my home screen. To this end I found it easiest to chuck the single webpage as a variable in the ino file.
const char index_html[] PROGMEM = R"rawliteral(
<html>
...
</html>
)rawliteral";
The above syntax allows you to layout the html on multiple lines and not have to worry about escaping any characters. If your page gets complicated or you want lots of different files, you might want to consider libraries that create a filesystem on the ESP’s flash and let you chuck files in a data folder inside your project folder. I’ve only got one 47 line file, so all that seems like overkill.
The secret sauce#
Now this is where other guides will get you to link buttons to non-existent pages so that the ESP8266 can receive the command in the request URL. Fancy guides might even instruct you do make them POST requests with some fancy javascript. These require a whole TCP/HTTP connection to be created and answered for each command, and I can imagine smashing that volume down button when the loud explosions start.
Instead I’m going to use a websocket. A single persistent TCP connection that allows the browser to send commands that can be turned into IR signals the moment they arrive.
Luckily there’s an ESP8266 webserver library that supports websockets, ESPAsyncWebServer. It’s event driven so you can pretend you’re writing a node.js app, except it’s in C, and there’s no npm. Actually sounds fantastic now that I write it out.
ESPAsync Setup#
Set up the web server by defining a server and websocket variable and lines in setup()
#include <ESPAsyncTCP.h>
#include <ESPAsyncWebServer.h>

AsyncWebServer server(80);
AsyncWebSocket ws("/ws");

void setup() {
  //Point to function to handle events from the websocket
  ws.onEvent(onEvent);
  //Add endpoint for the websocket
  server.addHandler(&ws);

  //Send the index string when clients request "/"
  server.on("/", HTTP_GET, [](AsyncWebServerRequest *request){
    request->send_P(200, "text/html; charset=utf-8", index_html);
  });

  //Start up the webserver
  server.begin();
}
For the websocket we’re going to have to have a method onEvent that will be called when clients connect, disconnect or send data.
//websocket event handler
void onEvent(AsyncWebSocket *server, AsyncWebSocketClient *client, AwsEventType type,
             void *arg, uint8_t *data, size_t len) {
  switch (type) {
    case WS_EVT_CONNECT:
      Serial.printf("WebSocket client #%u connected from %s\n", client->id(), client->remoteIP().toString().c_str());
      break;
    case WS_EVT_DISCONNECT:
      Serial.printf("WebSocket client #%u disconnected\n", client->id());
      break;
    case WS_EVT_DATA:
      //We got a message, let's call the method to handle it
      handleWebSocketMessage(arg, data, len);
      break;
    case WS_EVT_PONG:
      break;
    case WS_EVT_ERROR:
      break;
  }
}
Finally we’ll have a function handleWebSocketMessage to read the websocket message and react accordingly. To start with we’ll just print it to Serial.
//handle data from websocket
void handleWebSocketMessage(void *arg, uint8_t *data, size_t len) {
  AwsFrameInfo *info = (AwsFrameInfo*)arg;
  if (info->final && info->index == 0 && info->len == len && info->opcode == WS_TEXT) {
    //Print the received text to Serial
    Serial.println((char*)data);
  }
}
Frontend#
We’re gonna keep the web app to a single page with a bunch of buttons that send a corresponding message back to the ESP.
...
<button id="volUp" onclick="pressButton(this)">🔊</button>
<button id="volDown" onclick="pressButton(this)">🔉</button>
...
<script>
var gateway = `ws://${window.location.hostname}/ws`;
var websocket;

function onLoad(event) {
  websocket = new WebSocket(gateway);
}

function pressButton(element) {
  websocket.send(element.id);
}
</script>
With the above a websocket will be opened when the page loads, and the id of the button sent when a button is pressed.
All together now#
The end result works pretty well. Since there is no reliance on the cloud, it’s quick to load and respond to button presses. I’ve left it plugged in for months and haven’t had it crash or act up.
You can go through the entire ino file here. It’s set up with my equipment’s codes and still a bit rough but can be an example for how to get started.

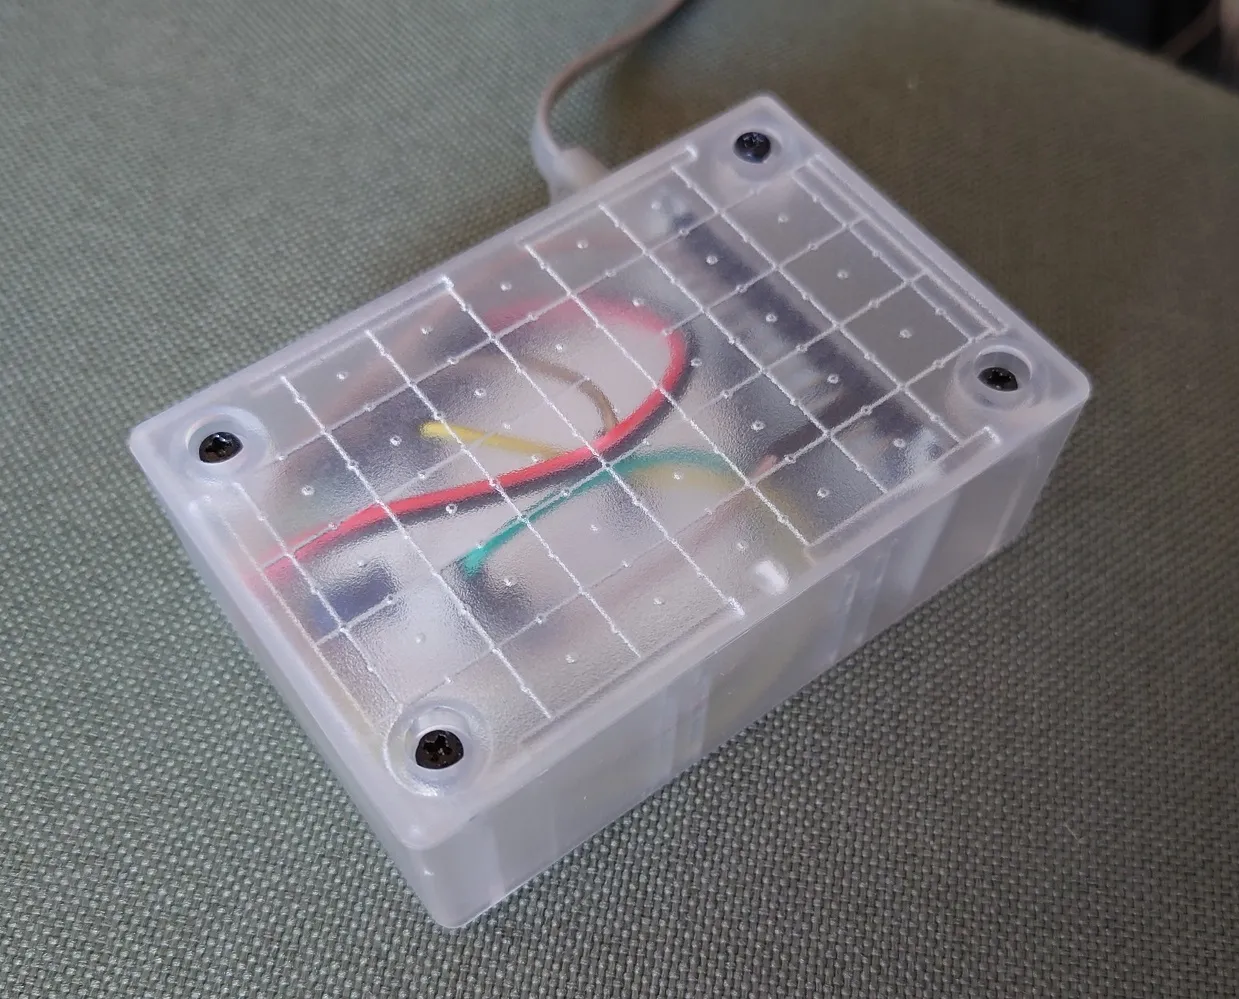
Going for the 90s clear craze nostalgia
The clear plastic means I didn’t have to worry about drilling a hole and lining up the IR diode, it can just shine through.
Bonus Pro Tips#
Managing Websocket Connections
You may have noticed that we connect the websocket, but don’t disconnect it. Mobile browsers will disconnect the socket on their own when you leave the page eventually. Even so, ESPAsyncWebServer recommends running cleanupClients() every few minutes to disconnect and free any stale clients.
This seems extreme to me, my IR blaster won’t have more than a couple of clients connected at once. So I call the cleanupClients() every 30 minutes and it seems to be going fine.
Reconnecting sockets
The websocket is started on page load, but between the mobile browser and ESP disconnecting the websockets whenever they want, the web page may outlive the socket. You switch away from the browser only to come back to find the socket is disconnected and none of the buttons work any more. A refresh will fix it, but even better we can listen for the focus event to check the socket status and reconnect if required.
document.addEventListener('focus', (e) => {
  if (websocket.readyState === WebSocket.CLOSED) {
    initWebSocket();
  }
});
After a lot of use, this fixes the issue 99% of the time. Should probably just run the same check when a button is pressed as well for good measure.
Comment
- Username, 2026-01-27